
Manually override the admin fields for Gated Content or Webinar ‘Protected Content’
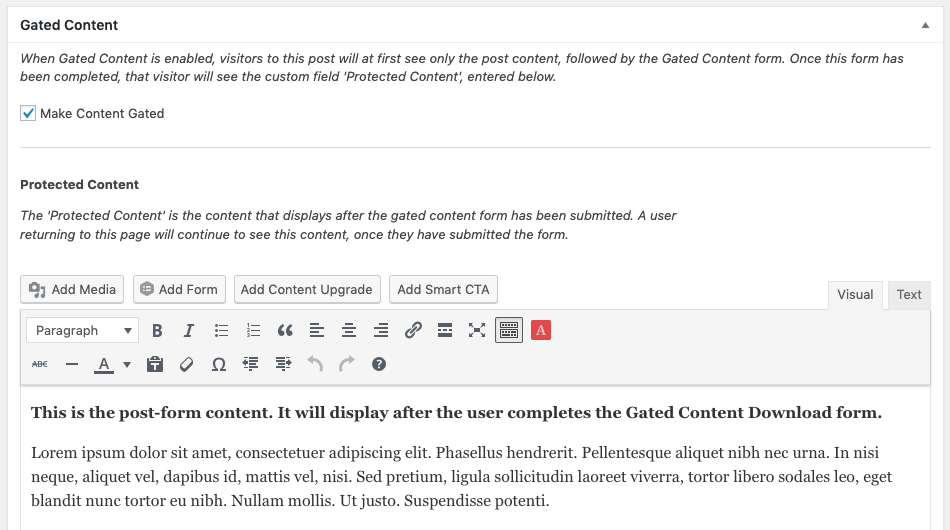
By default, when editing a Gated Content or Webinar post, the Protected Content editing interface looks like this:
If, however, you are customizing the template that shows after the visitor has completed the form, you may wish to customize this admin screen as well. To do this, you can use the following filter(s):
nfgated_protected_admin_html
nfwebinars_upcoming_protected_admin_html
nfwebinars_past_protected_admin_html
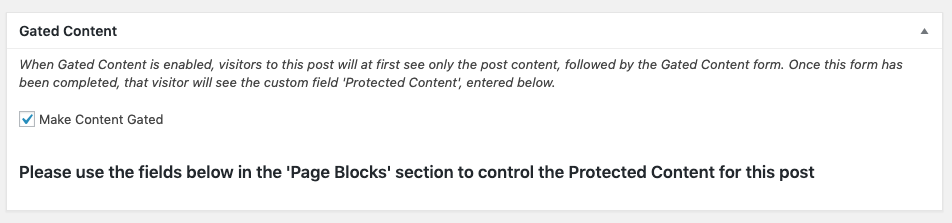
For instance, to hide the Protected Content field for a post that is flagged as “Gated”, and instead show a custom message, you could use the following:
function custom_protected_admin_html( $protected_admin_html ) {
	return "<h3>Please use the fields below in the 'Page Blocks' section to
 		 control the Protected Content for this post</h3>";
}
add_filter( 'nfgated_protected_admin_html', 'custom_protected_admin_html', 10, 1 );
The above filter would cause the screenshot shown above to instead display the following:
Manually set the current user’s tracking and progressive profile session.
The Newfangled Progressive Profiling plugin uses cookies to remember visitor activity. Once the visitor fills out a form on the website, this cookie is set, with the email address being the unique identifier. The visitor then sees pre filled form fields, subsequent required form fields, different smart CTAs, etc., all based upon their history.
If you know the current visitor’s email address through the use of another 3rd-party tracking system or a URL parameter, this address can be supplied to the Newfangled plugins. If that email address has a session associated with it, we’ll assign the visitor that session so we can start showing them customized engagement data immediately even if they don’t have a Newfangled cookie set (e.g. if they’re visiting on a mobile device different from the one they previously completed a form on).
To set this, use the following hook:
add_filter( 'nfprofiling_setcurrentsession', 'nf_lookup_profile', 10, 1 );
This hook will provide the existing session email address as an argument if we already have one. You can use this to optionally *not* override the session if one is already set.
The hook should return the email address you wish the Newfangled plugins to use as the current visitor’s session. If one is not returned and we don’t already know who the visitor is, then an anonymous session will be used as normal.
Example PHP Code
/**
* If we know who the current user is (email address) via a 3rd-party lookup, provide that
* email address to the Newfangled Tracking and Progressive Profiling plugins. Those plugins
* will then use that email's session, if one exists.
*
* This dummy code illustrates how you might obtain the user's identity from a cookie or
* a URL parmater.
*
* @param  string $existing_email - email address already being tracked (if one exists)
* @return string $override_email - the email address obtained from the 3rd-party source (if found)
*/
function nf_lookup_profile( $existing_email='' ) {

    global $_COOKIE, $_GET;

    //  Does the tracking system know who the user is?
    if ($existing_email && $existing_email != '') {
        //  Yes - no need to look them up
        return null;
    }

     // Try to look up the user, based on their cookie value
     if( $fake_cookie_value = $_COOKIE['fake_cookie']) {
        //  $override_email = $dummy_api->GetCurrentUserEmailByCookie( $fake_cookie_value );
     }

     // Try to look up the user, based on their URL parameter
     else if ($fake_url_parm = $_GET['fake_url_parm']) {
         // $override_email = $dummy_api->GetCurrentUserEmailByUrlParm( $fake_url_parm );
     }

    //  Did we get a value?
    if ($override_email) {

        //  Lets return it. We’ll then use that user's progressive profile
        return $override_email;
    }

    //  Nothing found
    return null;

}
Get the user profile’s email address via Javascript
If the Newfangled Progressive Profiling plugin is tracking the current visitor, you can obtain the visitor’s profile fields via the following WordPress REST API endpoint:
GET /wp-json/nfprofiling/v1/profile
If a profile is found, this endpoint will return a status code of 200 along with JSON object containing the complete profile fieldset. If no profile is found, the response will be a status code 204 with a null profile object.
Example Javascript code
The following example javascript code shows how to look up the profile via a jQuery AJAX call:
<script>

// The REST endpoint
restEndpoint = '/wp-json/nfprofiling/v1/profile';

// Make the AJAX call
jQuery.ajax( {
url: restEndpoint,
type: 'GET',
dataType: 'json',
success: function( response ) {

// Debug the response
// This is a json object containing
// the entire profile. For instance:
// {First Name: "test", Last Name: …}

if (response &&
typeof(response.Email) != 'undefined') {
console.log(response.Email);
}
}
} );

</script>