
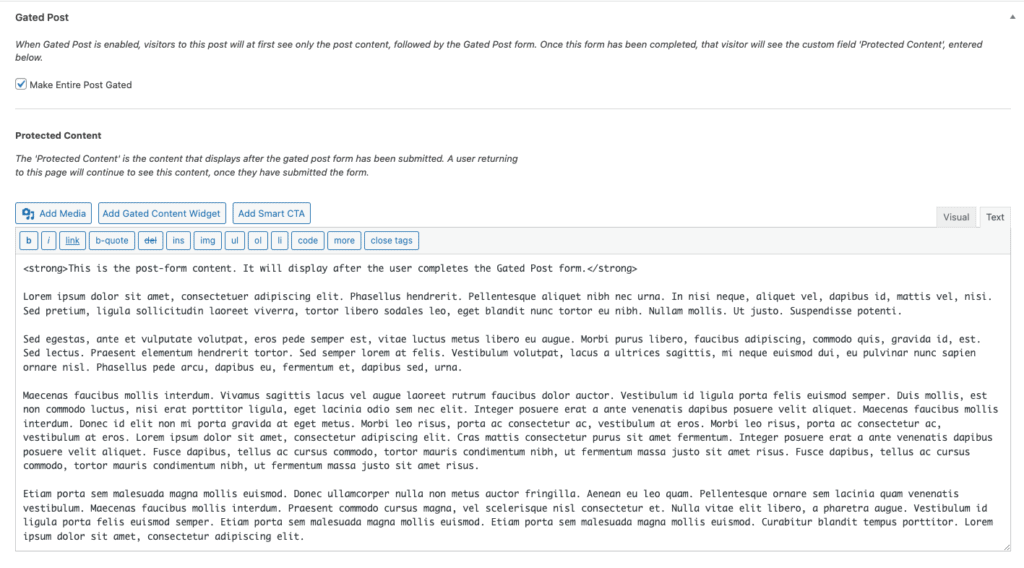
A post can be made completly gated using the “Gated Post” checkbox that appears when editing the post. This means that the visitor must complete a form before being able to see the full post content.
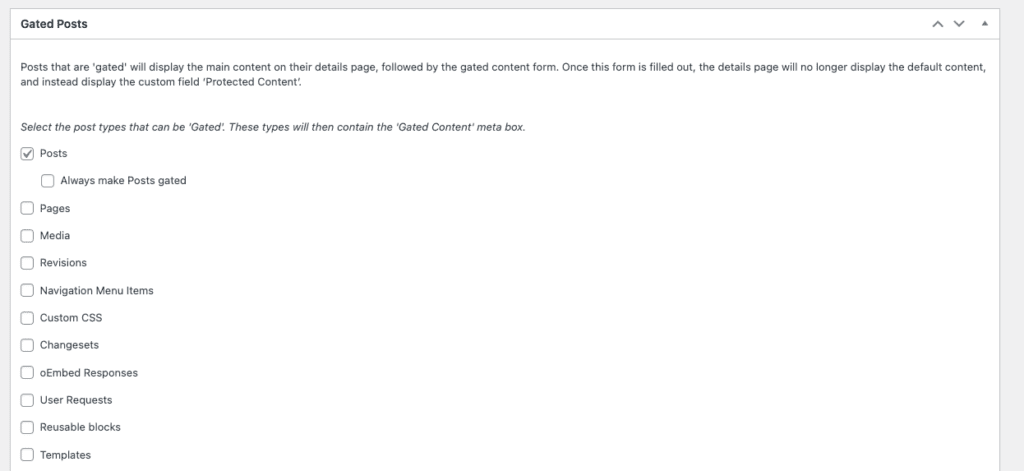
The post types that contain this “Gated Post” checkbox are controlled in the “Newfangled Gated Content” plugin settings.
Depending on how your templates are built, you may want to use the main post editor content as either the pre-form content, or the post-form protected content. This is controlled in the Newfangled Gated Content settings.

Use the below instructions if the main content of the page is set to display before the registration form, which is the out-of-the-box plugin configuration:
- In WordPress, go to Posts -> Add Post (or any preferred method of adding a new post).
- In the main content editor, enter the text you wish to display before the Gated Post form. The form chosen in the plugin settings will automatically display on the page beneath this text. If a default form is not selected in the plugin settings, you will need to chose it here.
- Add the Protected Content, which will display after the prospect submits the Gated Post form.
- Make any other necessary content updates (add Authors, Categories, Message Areas of Focus, etc.) and publish.
Use the below instructions if the main content of the page is set to display after the registration form, which is an alternate setting available in the plugin settings:
- In WordPress, go to Posts -> Add Post (or any preferred method of adding a new post).
- In the main content editor, enter the text you wish to display after the prospect submits the content gate form.
- Add the Intro Content, which will display before the Gated Post form. The form chosen in the plugin settings will automatically display on the page beneath this text. If a default form is not selected in the plugin settings, you will need to chose it here.
- Make any other necessary content updates (add Authors, Categories, Message Areas of Focus, etc.) and publish.